
Tickets Reports – Overview Page
This page provides a comprehensive overview of the Tickets Reports —covering its layout, different views of reports within the Taqtics SaaS ecosystem

PAGE FLOW -
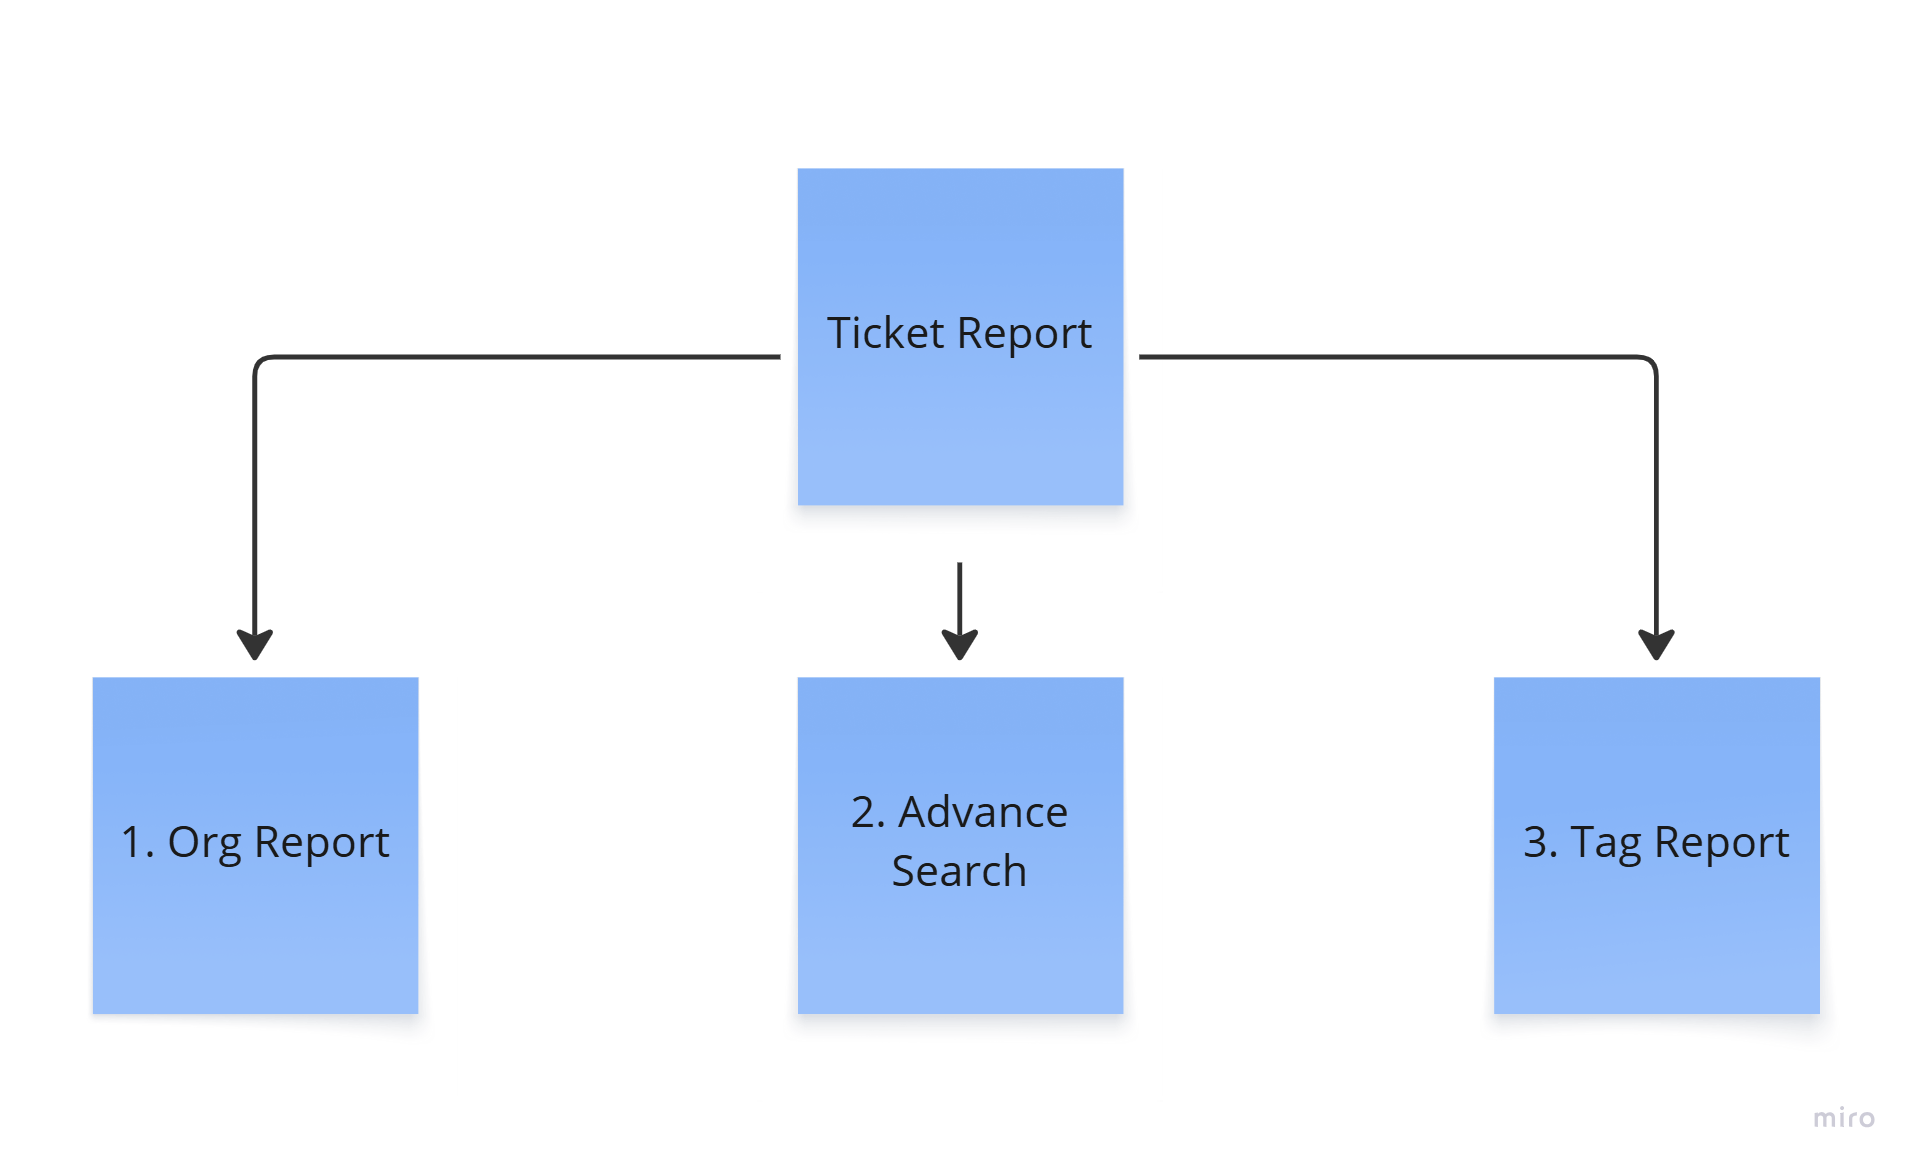
1. Org Report
Objective
Use this view when you want a quick, high-level list of tickets raised during a specific time period. It helps you scan, search, and access tickets that fall within your chosen date range. From here, you can load more tickets, search among the listed ones, and dive into any specific ticket to review or take action.
View Ticket Org Report
Video Walkthrough
Text Guide
Step by Step guide :
1. Login to your Taqtics account.
Logging in to access the reporting dashboard.
2. From the landing page, click on “Reports” from the top menu.
Navigating to the section where ticket-related reports are listed.
3. On the Reports page, select “Tickets”, then click on the “Org Report” tab.
Accessing the Org Report view that shows ticket data based on filters like date range and status.
Org Report Layout
The Org Report view consists of a filters panel at the top and a tabular ticket grid below, displaying up to 500 tickets by default.
Top Filters Section
4. Search Bar
- Type a Ticket ID directly into the search bar.
- The table below updates in real-time as you type.
- Click the “Reset” button beside it to clear the search.
Quickly find a specific ticket from the displayed results or reset to see the full list again.
5. Date Range Filter
- Select “From” and “To” dates using the calendar input.
- Click “Apply” to update the table view with tickets created in that range.
Use this to narrow down tickets created during a specific time period.
6. Load More Button
- If more than 500 tickets exist for the selected range, click “Load More” to expand the view and load additional tickets.
Use this to access tickets beyond the initial 500-entry limit.
7. Report Setting Button
- Click to open a checklist of available table fields.
- Check or uncheck columns to customize the fields visible in the ticket grid below.
Tailor your report view by showing only the ticket fields you care about.
8. CSV Download Button
- Click “CSV” to download the report based on currently visible columns.
- To export all possible fields, click the dropdown arrow beside it → check “With All Fields” → click CSV.
Download the ticket report as per your selected configuration for sharing or offline review.
9. Status Buttons Row
- Buttons like Total, Open, In Progress, Completed, Closed, Rejected, On Hold, Overdue, Due Today, On Time are available.
- Each shows a badge count indicating the number of tickets in that status.
- Click on any status to filter the table below accordingly.
Quickly filter tickets by their current status within the selected date range.
Bottom Section – Ticket Table View
The table below displays tickets based on the selected filters and settings. Each row shows the ticket’s basic information:
- Ticket ID
- Title
- Store Name
- Created Date
- Current Status
- Priority, etc. (depending on fields selected in Report Settings)
You can scroll through this list or click on any row to open the Ticket Detail View, where you can add comments, update status, or close the ticket.
End of text guide
💡
- Checkbox of “Report Setting” of Report and Tickets are synced
- Use “Load more” to access tickets beyond the initial 500-entry limit.
2. Advance Search
Objective
Understand how to instantly locate any ticket by ID, regardless of when it was created. This is useful when you want to bypass selected date filters and need to fetch tickets directly from the backend and check their current status or take quick follow-up actions.
View Ticket Advance Search
Video Walkthrough
Text Guide
Step by Step guide :
1. Login to your Taqtics account
Access the platform using your authorized credentials to begin.
2. From the left navigation panel, click on "Reports"
This opens the central reporting interface on the same page — no redirection.
3. You will now see six report types listed:
- Process
- Learning
- Assessment
- Ticket
- Action Point
- Asset Ticket
These represent different modules for which reports can be generated.
4. Click on "Ticket"
This filters the report section to only show reports related to Tickets.
5. Within the Ticket Reports, you will see three tabs:
- Org Report
- Advance Search
- Tag Report
6. Click on the "Advance Search" tab
This is where the advanced ticket search and filtering functionality resides.
🔍 Advanced Search
A. Ticket ID Search Bar (with Reset button and Search icon)
- Type the Ticket ID into the search input.
- Click the Search icon to trigger the search.
- Use the Reset button to clear the input.
🟢 Important Note:
This search directly queries the DB, so it works regardless of pagination. You’ll find the ticket even if it’s not currently visible or "loaded" on the screen.
B. Date Range + Status Dropdown (Work Together)
- Select a Date Range from the calendar picker.
- Then choose a Status from the dropdown:
- Open
- On Hold
- In Progress
- Complete
- Closed
- Rejected
- Click Apply (button next to the dropdown) only after selecting both date and status.
🟡 Important Rule:
You must select both — the date and the status — before clicking Apply. The system will then show all tickets that were in the selected status during that time period.
C. Download CSV (Dynamic Based on Results)
- Once tickets are fetched, a count of total results appears near the top of download icon.
- You’ll also see a Download icon ⬇️ next to it — click this to download the ticket list as-is.
- To export all possible fields, click the dropdown arrow beside it → check “With All Fields” → click CSV.
D. Load More Button (Pagination)
- Scroll to the bottom of the results table and click Load More to fetch additional records.
🔵 Note:
If you're using the Ticket ID search here in Advance search, the Load More button doesn’t matter — the system fetches the exact match directly from the database, even if it wasn't previously loaded.
End of text guide
💡
- It follows the same report setting of the the org report
- Here Search Bar directly queries the DB, so it works regardless of pagination. You’ll find the ticket even if it’s not currently visible or "loaded" on the screen.
- Let’s say even if you select "Open" from the status dropdown, the tickets shown in the results table may display different statuses like Closed, On Hold, etc. This is because the status shown in the table reflects the current status of each ticket, not the status it had during the selected date range.
3. Tag Report
Objective
Understand how to track tickets grouped under specific tags like issue type or category. This helps you identify which areas have more issues, view counts by status like open or closed, and analyse recurring patterns across the tickets.
View Ticket Org Report
Video Walkthrough
Text Guide
Step by step guide :
1. Login to your Taqtics account
Logging in to access the ticket reporting system.
2. The landing page will appear
You will see the main dashboard with access to various modules.
3. From the left navigation panel, click "Reports"
Accessing the reports module from the main navigation panel.
4. Under Reports, you’ll see multiple report types:
- Process
- Learning
- Assessment
- Ticket
- Action Point
- Asset Ticket
Click on "Ticket ".
This reveals sub-reports related to tickets.
5. Under Ticket Report, select "Tag Report"
You are now inside the Tag Report section where data is categorized based on ticket tags.
Tag Report Section Overview
Below the “Tag Report” heading, you’ll find a sub-section called:
Ticket Tags
- This section displays a list of tags (row-wise) as defined by your team in Creator Mode.
Tag Table Interaction
- Click on any tag from the list
- When you click on a tag (e.g., Zone), a table will expand directly below it.
- This expanded table will have the following predefined columns:
- Total
- Closed
- Open
- On Hold
- Overdue
- Due Today
- In Progress
- Completed
- The rows of this table will correspond to values preconfigured for that tag in Creator Mode.
- For example, if the tag is "Zone", and the dropdown options are North, East, West, South, then these will appear as rows, with the respective ticket counts under each status column.
End of text guide
💡
- ✅ Only tags that are configured with dropdown options in Creator Mode will show populated tables with ticket counts.
- ❌ Tags where users manually type values (e.g., a tag of “Phone Number”) will not show any data in the table, as they don't have predefined values to group and count tickets.