
Use this to set up your asset structure inside Taqtics. Add fields, group types, define which stores can view/edit, and decide what data to capture (like expiry, image, vendor, etc). All assets start from here — created and managed by platform admins.
💡 Note: In Taqtics, you first create an Asset Table, and inside that table, you add multiple Asset Items. The fields (columns) inside an asset table are defined during setup (via the Build tab) and stay uniform across all asset items — meaning every entry in the table will follow the same structure.

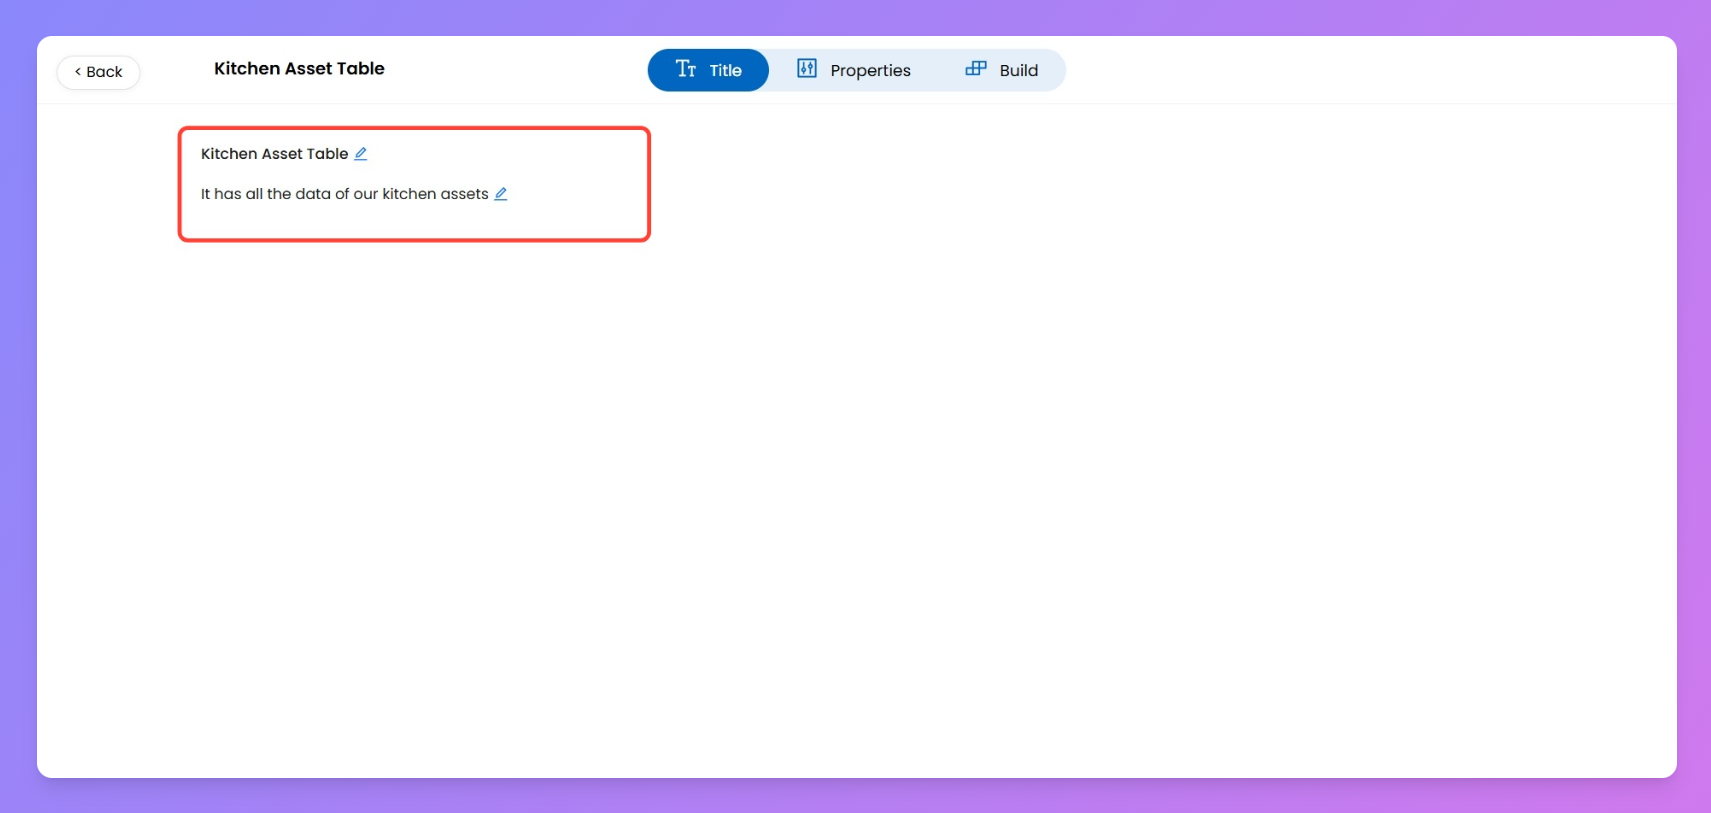
(I) Title Your Asset Table
Give your asset table a clear name and description to define what kind of assets it will track.
This helps everyone understand the table’s purpose — whether it’s for kitchen tools, licenses, or anything else.
Quick Steps
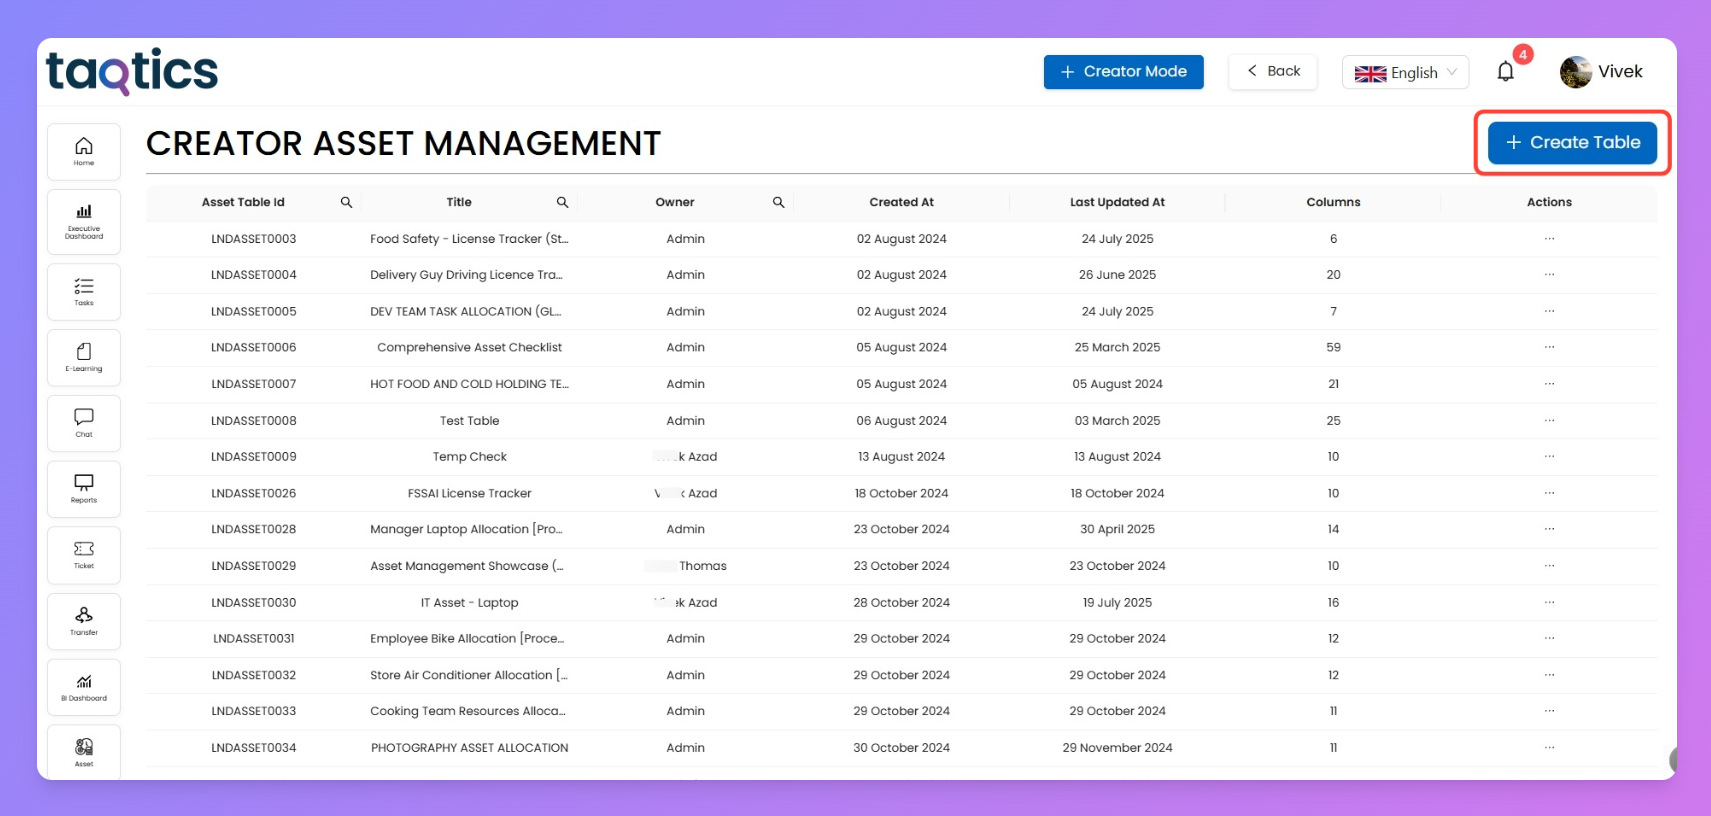
- From the landing page, tap the Creator Mode button on the top-right corner.
- Click Asset Management under the Creator Mode column.
- Hit + Create New Table.
- Add a Title and Description for your Asset Table.
Both the name and description can be edited anytime from the Title tab.
(II) Properties: Configure Asset Settings
Now go to the Properties tab to fine-tune how your asset behaves. This section has four key parts:
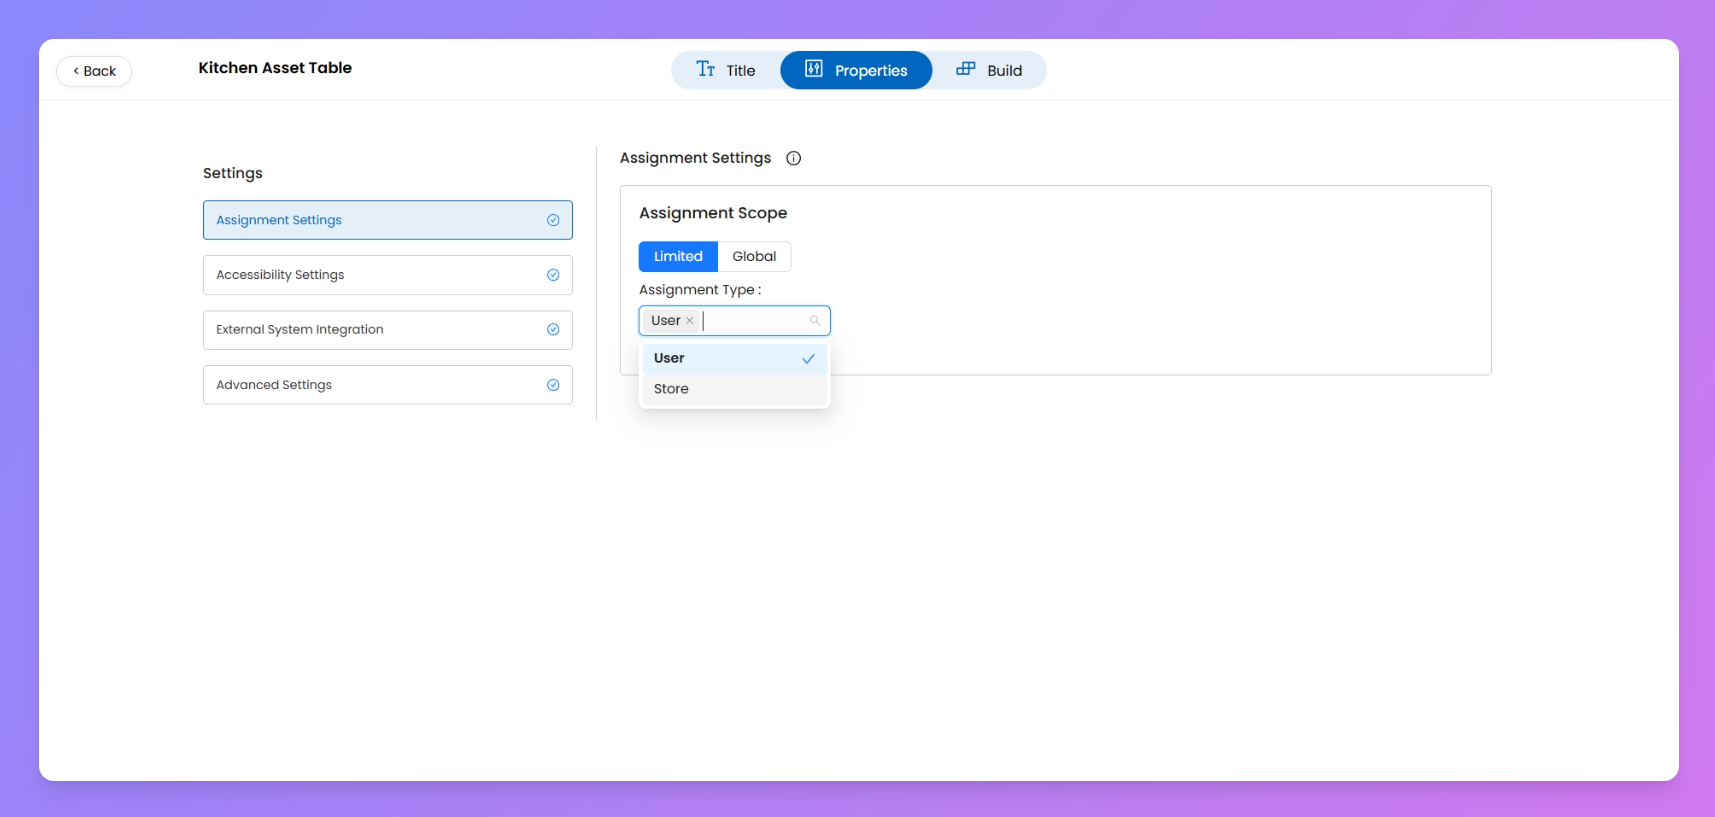
1. Define Who Can View or Own the Assets
This is where you set how asset entries will be assigned — whether they’re tied to specific users/stores or globally available.
Limited Assignment (User/Store-based)
Use this if you want
assets items to be assigned and visible only to specific users or stores.You can select from the following types while configuring:
- User Based: Assets items created will only be visible to the specific user who created them or to users explicitly assigned to them.
- Store Based: Assets will be visible only to those who manage or are assigned to the relevant store.
- User & Store Based: Both user-level and store-level visibility is applied. Assets will be seen by assigned users and those overseeing the associated store.
💡 Once an assignment scope is set and assets are created, avoid changing this configuration later as it may cause data issues.
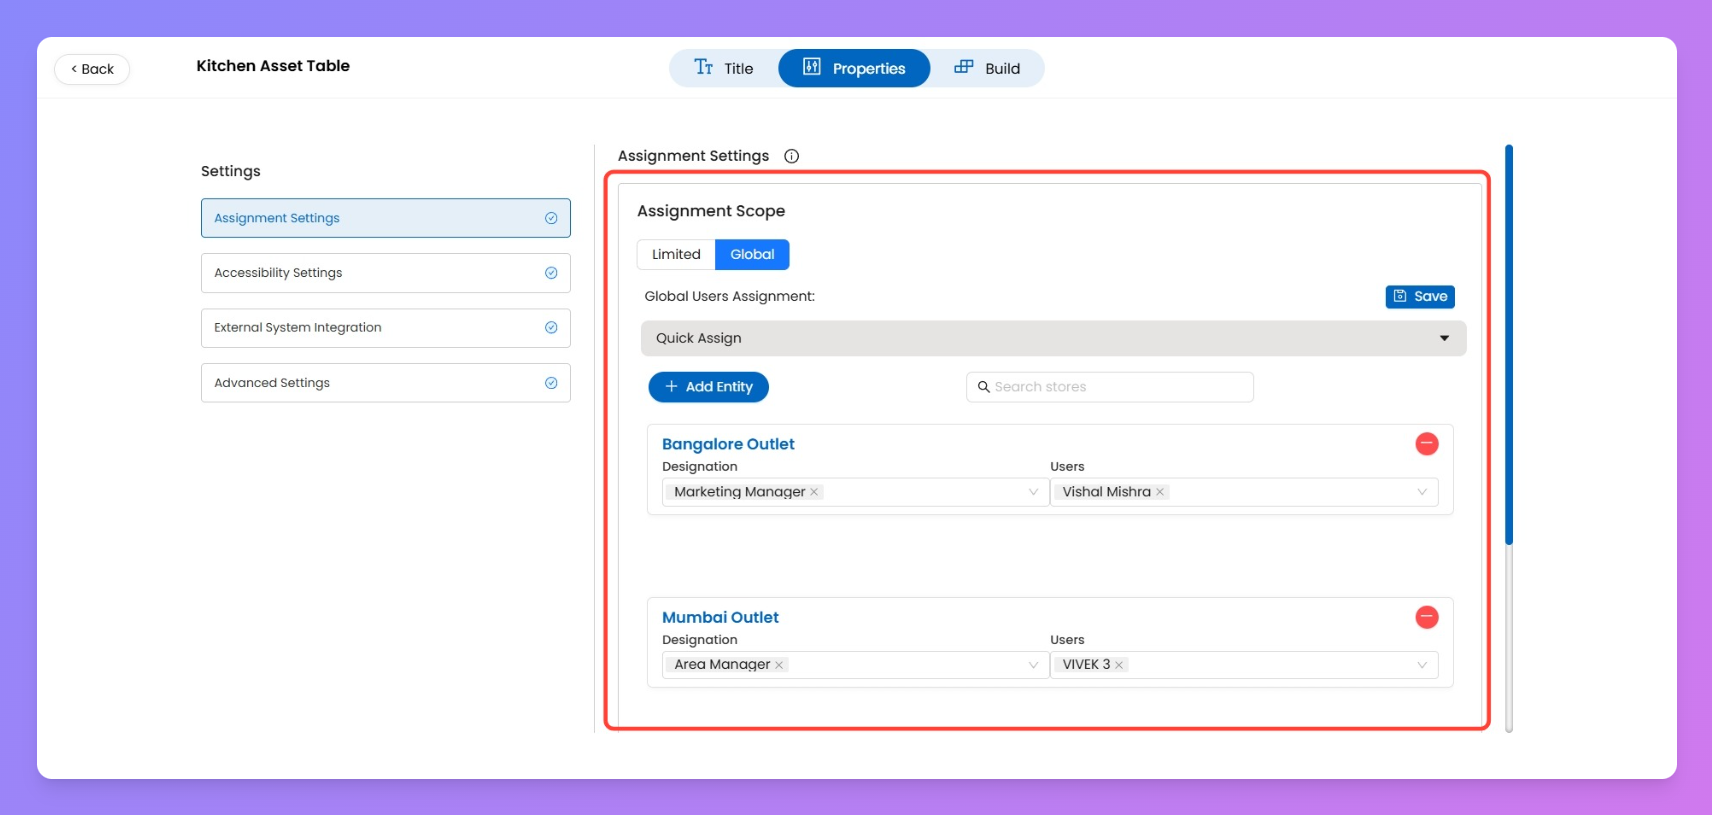
Open Access (Global Table View)
Use this option when assets items don’t need to be linked to any specific user or store.
Instead, you can manually define who can view or edit the
full asset table using role-based access.For example, if you enable Global Access:
- All entries in the table will be visible to the users/stores you assign at a global level.
- Asset entries will not have to be individually assigned.
- This mode is useful for centralized teams like Admin, Maintenance, or Licensing.
Scoped assignments (like User/Store) apply to each individual asset item, whereas Global access applies to the entire asset table — giving access to everyone selected without item-level ownership.
2. Control Who Can Edit or Lock Asset Data
Decide what level of control your team should have over asset entries. This section helps you lock certain operations like creation, updates, or deletion — and restrict who can make changes to asset data once it’s live.
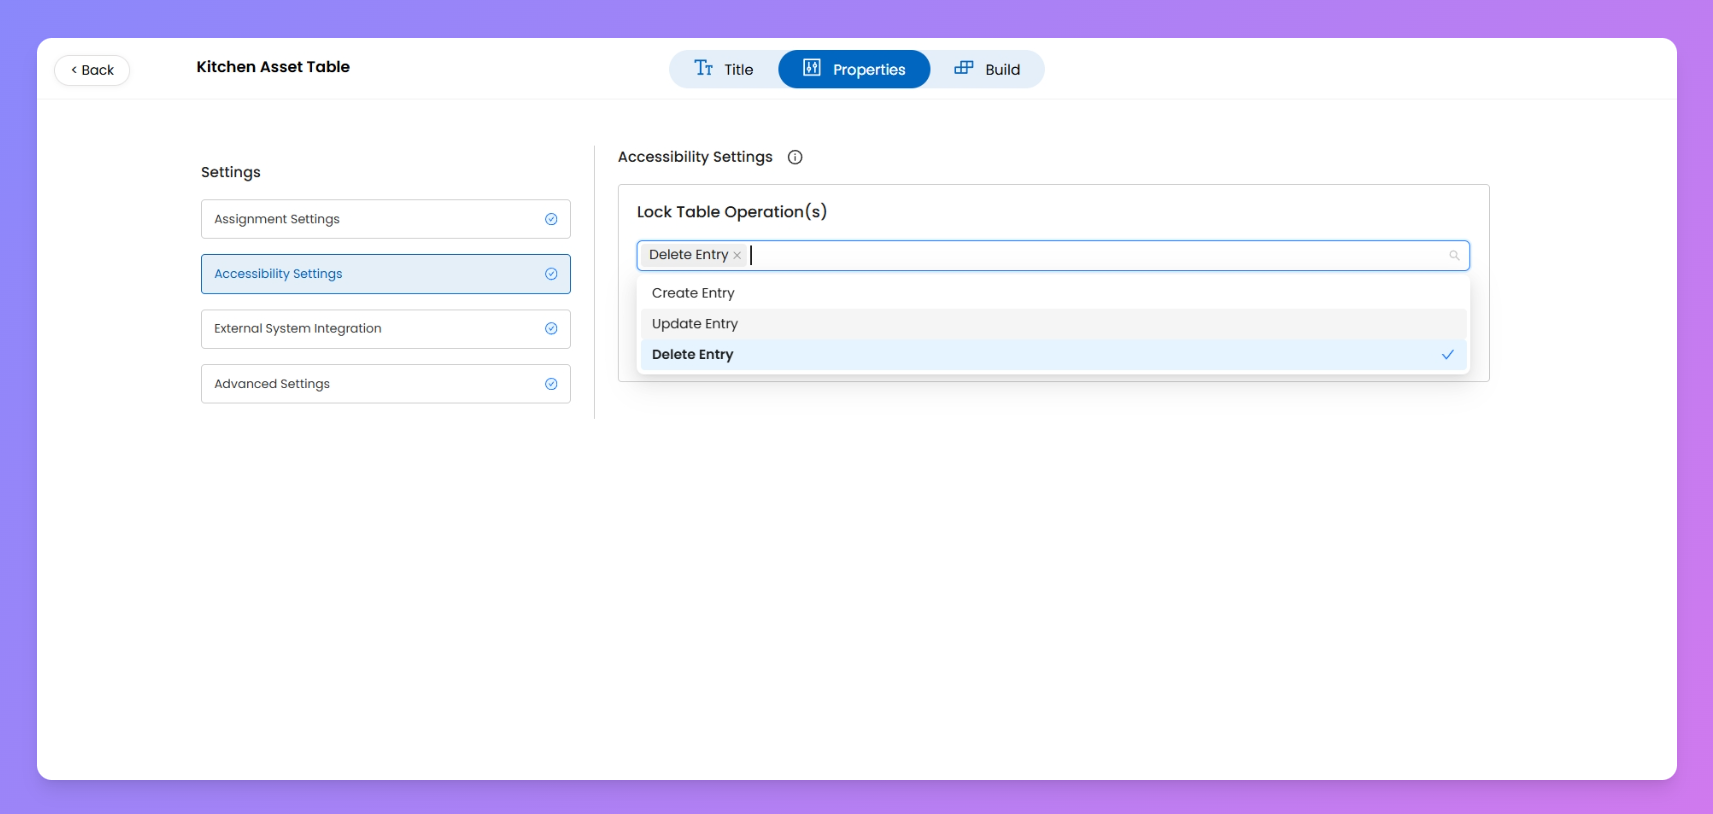
Lock Table Operations
Choose which asset operations should be completely disabled from the user view —
- creating asset items
- updating asset items
- deleting asset items
Once locked, even Admins won’t be able to perform the blocked action on the table from the User view . For example, if ‘Delete Entry’ is selected, no one can delete any asset item from that table until the lock is removed.
Allow Specific Roles to Update
Here you decide which designations can update the asset items within the table.
- Optional by Default: You don’t need to select roles unless you want tighter control.
- Empty Field Case: If you leave this blank, any user (irrespective of designation) assigned to the asset item can update it.
Mandatory in Store-Only Tables: If you’ve set the assignment scope to Limited with only Store selected (and not User), you must assign at least one role here. This ensures someone is authorized to make updates.
Lock Priority: Remember — if you’ve already locked the Update Operation under Lock Table Operations, that lock overrides this setting. In such cases, even assigned roles won’t be able to update asset items.
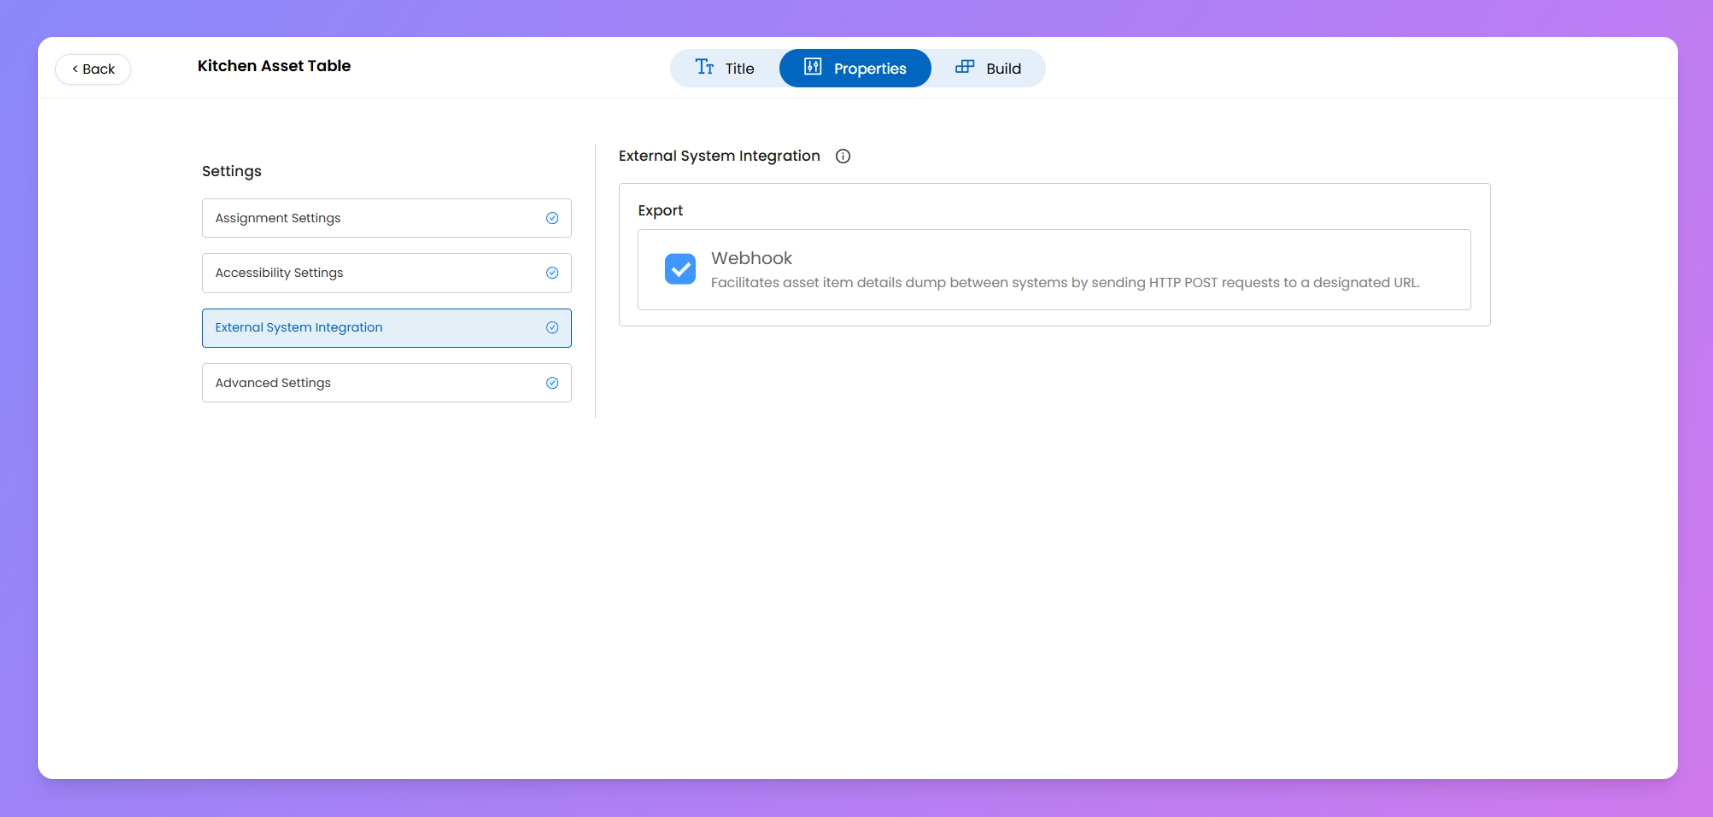
3. Enable System Integration (Optional)
Enable this if you want to send asset item data from Taqtics to another system using a webhook.
This will push updates via HTTP POST requests to a designated URL.
📌 This integration can be configured from here. For advanced setup, please reach out to your Taqtics account representative.
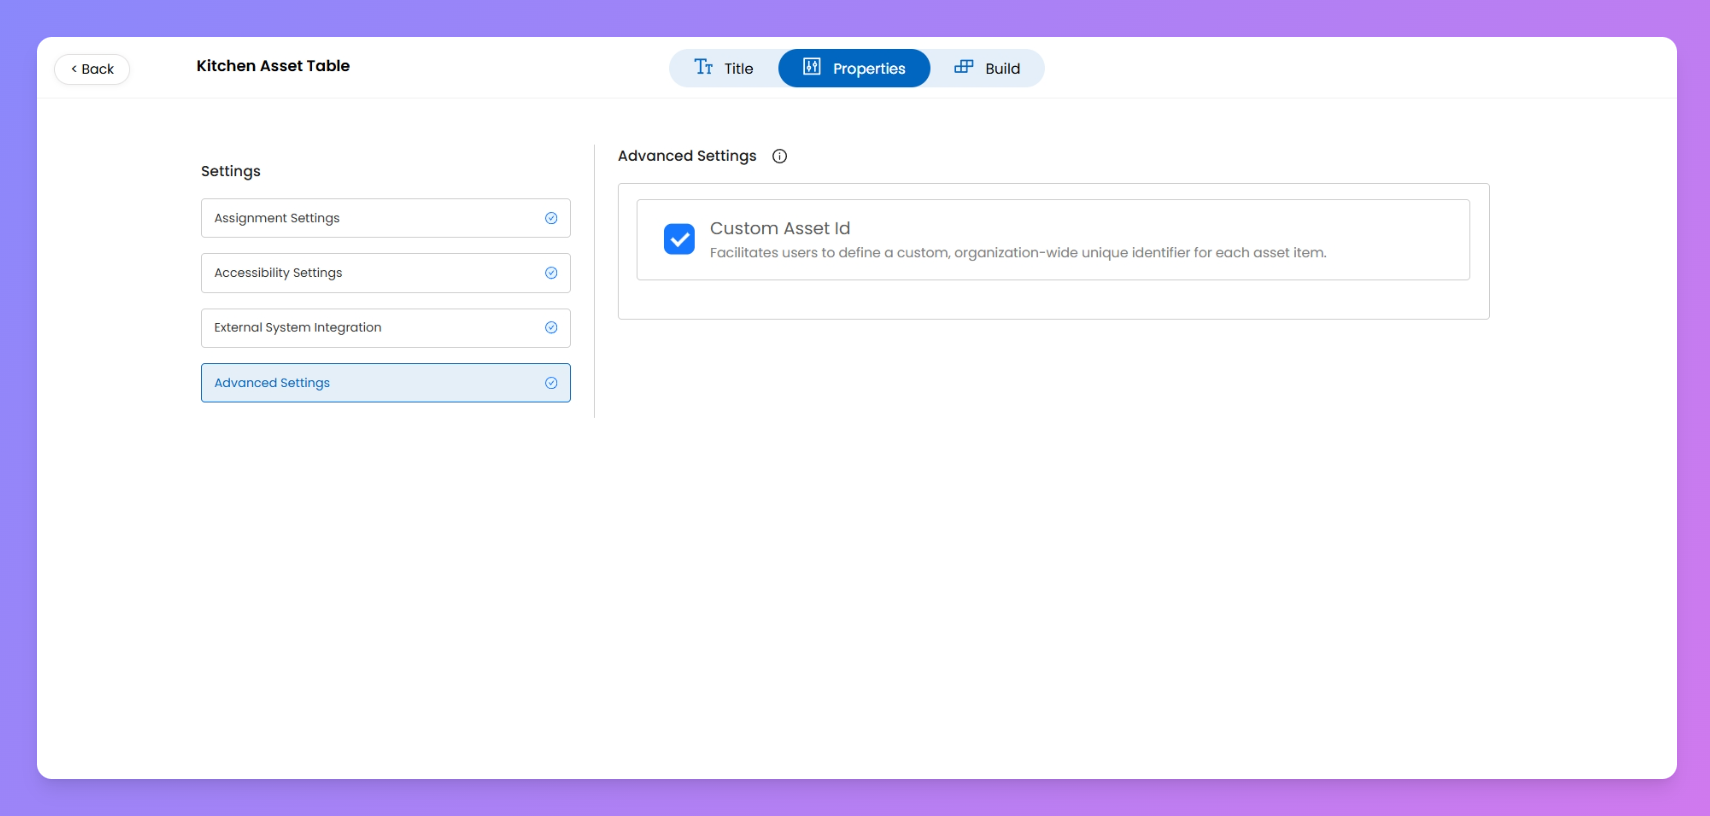
4. Set Asset Asset ID Format (Optional)
Toggle Custom Asset ID if your organization wants to define its own identifier for each asset item. This is useful when you already have asset codes defined in another system.
📌 When enabled, users filling or managing assets from the front end (like store employees or assignees) can manually enter or update the asset ID.If disabled, Taqtics will auto-generate an internal asset ID.
(III) Add Custom Fields to Your Asset Table
Once you’ve titled your Asset Table and defined assignment/access rules, it’s time to build your asset structure. Use the Build tab to define what fields (columns) will exist in each asset item
Fields you add here are common across all asset items in that table — think of it like creating a template that every row will follow. So if you add “Warranty Expiry Date,” every item in the table will have that column.
Default Fields Added by Taqtics
Every asset table automatically includes these fixed fields (cannot be deleted or renamed):
- Asset ID
- Asset Name
- Created By (User)
- Created At (Date)
- Last Updated At (Date)
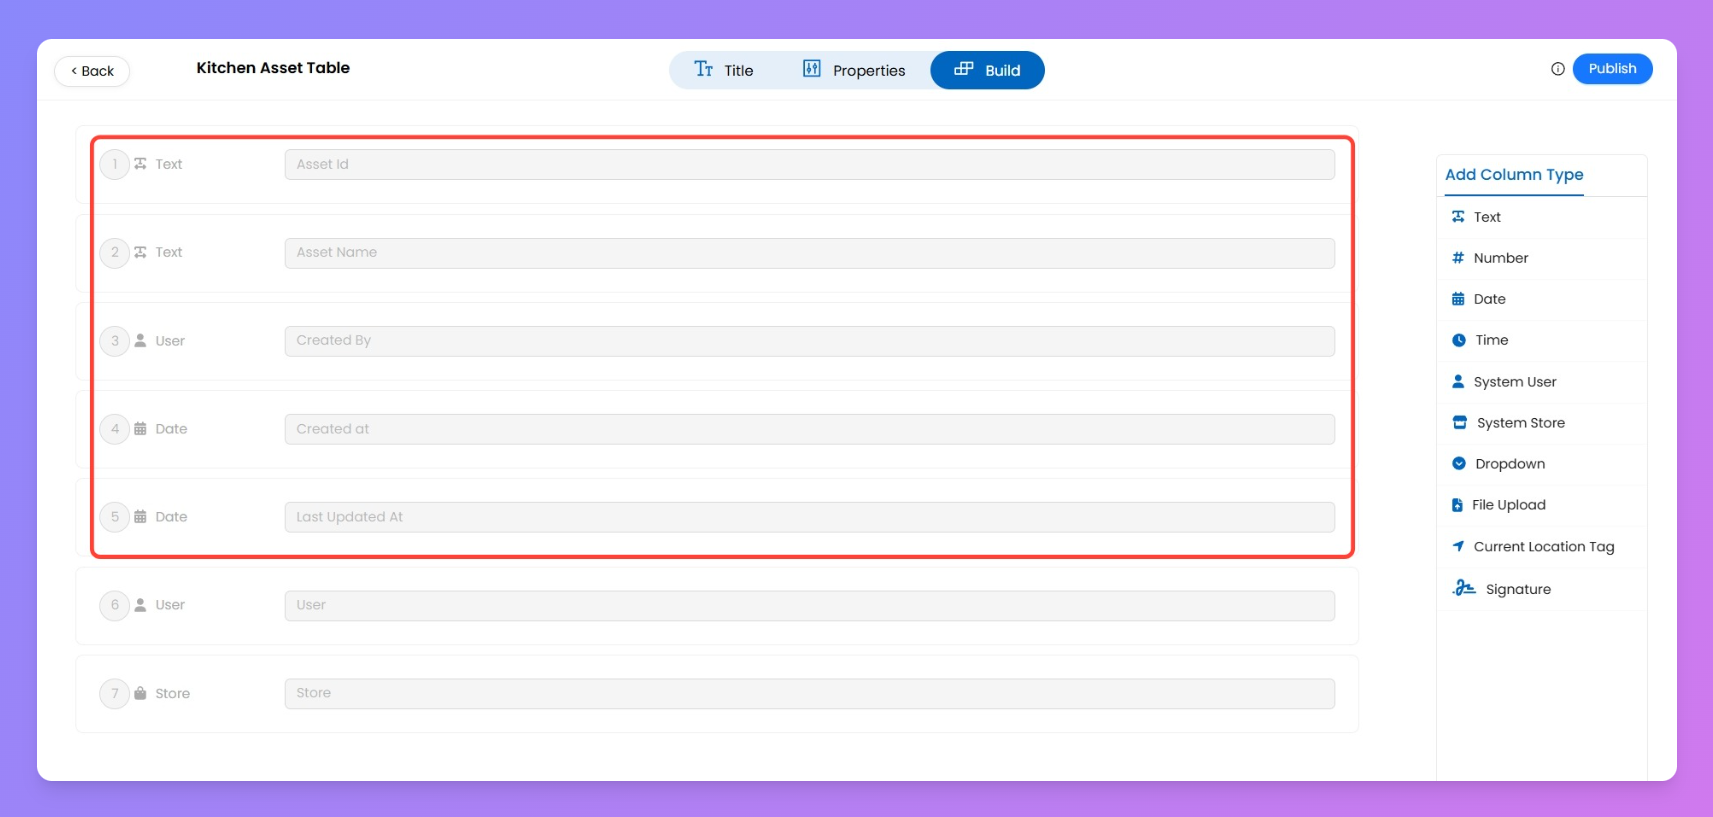
These fields ensure consistent system tracking and reporting across all asset tables.
Optional System Fields
If your Assignment Settings (set in Properties tab) is marked as Limited, and you’ve selected
User, Store, or both — then the following system fields become available with the already default fields:If you select Limited assignment, you must choose at least one: either User, Store, or both. If you select Global, you would not need any of them.
- User — links the asset item to a user
- Store — links the asset item to a store

Total Available Column Types
You can mix and match these field types to capture data your way:
- 🔢 Number
- 🕓 Time
- 🏬 System Store
- 📎 File Upload
- ✍️ Signature
Add-ons like comments, media add-ons, logic conditions, etc. are not available for asset fields — unlike Process or Audit questions.
Set Up Renewal Reminders using 📅 Date Question
Certain assets — like licenses, permits, or service contracts — have expiry or renewal dates. You can automate validity control and renewal reminders directly using the Date Question type in your Asset Table.
Once you add a 📅 Date Question, click the ⚙️ Settings icon beside it to open the configuration panel.
You’ll find two major options:
1. Date Validation
This setting helps control which dates can be entered by the user while creating or updating an asset item.
You can choose from:
- Disable Dates
- Restrict the user from selecting past or future dates.
- Within a Date Range
- Set a fixed start and end range within which the entered date must fall.
- Example: Ensure all renewals fall within this financial year (e.g., 01-Apr to 31-Mar).
2. Date Reminders
Turn on Date Reminders to automatically notify users when an asset’s due date is approaching or has passed.
You can configure this in two ways:
- One-Time Reminder:
- Choose from preset offsets like –1, –2, … –90 days or +1, +2, … +30 days.
- Example: Notify users 7 days before a license expires.
Send a single notification before or after the selected date.
- Multiple Reminders:
- Example: Remind at –30, –10, and +1 days from expiry.
Send recurring notifications on multiple days before and after the date.
📅 The reminder range spans from –90 days to +30 days relative to the entered date.
Once you've set up your desired columns and fields in the Build tab, simply click 'Publish' to generate your new Asset Table.
Use Case: License or Permit Renewal
In industries where periodic renewals are mandatory (like FSSAI, safety certificates, or vendor licenses), Date question ensures:
- Users cannot enter invalid or out-of-range expiry dates.
- Automatic reminders keep teams informed ahead of renewals.
- Compliance remains trackable and proactive.
💡 Combine this with a “File Upload” question to collect the renewed license copy alongside the updated expiry date — all in one flow.