
Create engaging learning journeys for your store teams with Taqtics’ built-in course builder. Whether you're rolling out SOP refreshers, seasonal updates, or onboarding modules — this guide walks you through setting up everything. From uploading learning materials and quizzes to dynamically assigning courses based on designation, we’ve got you covered with step-by-step setup instructions across all stages.
Create a New Category
Categories help you organize your courses into logical themes — like SOPs, Sales Training, Compliance, or Seasonal Updates.
How to Create a Category
- Go to the Categories & Courses page.
- Click the New Category button at the top.
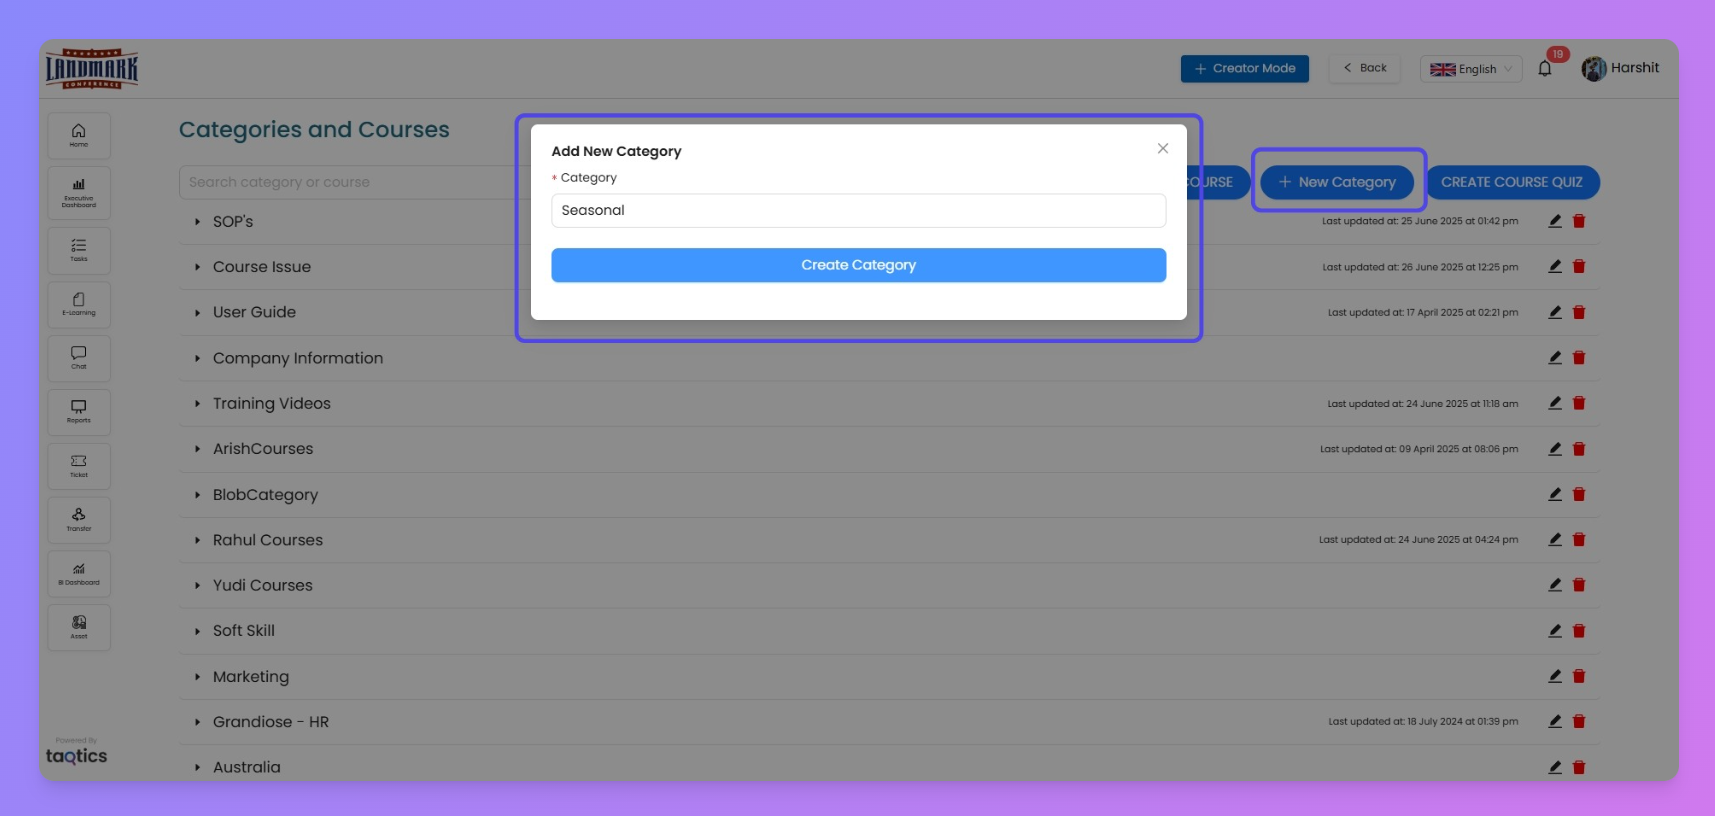
- Enter the name of your category.
- Click Create Category.
That’s it! Your new category will now appear as a row on the page with a toggle option. You can expand it to add courses inside.
Create Course Quiz
Courses often need to test user knowledge with a short quiz at the end. Instead of creating new quizzes every time, you can pre-build and reuse quizzes from a central question builder.
Here’s how to create your quiz inside Taqtics.
Quick Steps to Create a Course Quiz
- Log in to your Taqtics account.
- Click the Creator Mode button from the top-right corner.
- From the left menu, select Content & E-Learning.
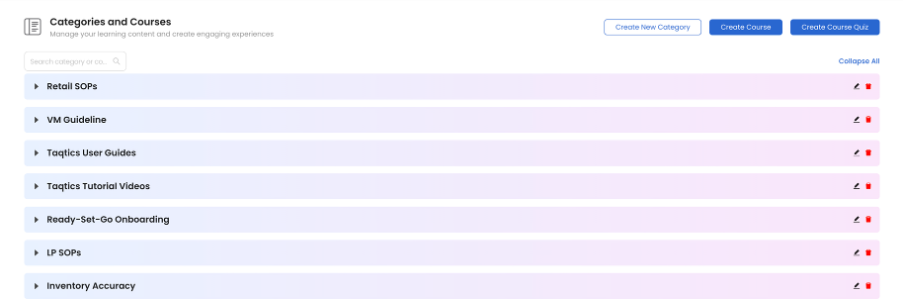
- You’ll land on the Categories & Courses page.
- Click on Create Course Quiz at the top.
- You’ll now see the Quiz Library screen.
- If quizzes already exist, they’ll show in a list.
- To create a new one, click + Quiz.
Quiz Builder Interface
After clicking + Quiz, you’ll land on the Quiz Builder screen — similar to the Process builder, but with a more focused setup.
Question Types Supported:
- Short Answer
- Single Answer
- Multiple Answer
Enhancements Available:
- Add Instructions (for each question)
- Mark as Mandatory (click the question number to toggle)
- Allow File Attachment (submitters can upload documents)
Structure Support:
- Sections & Subsections are available for better organization.
Quiz Properties
Once your questions are set, move to the Properties tab to configure the overall quiz settings:
Setting | Description |
Title | Name of the quiz (e.g. “Basics of P&L”) |
Description | Short info about the quiz content |
Minimum Passing % | Required % to pass (e.g. 30) |
Max Attempts | How many times a user can attempt the quiz (e.g. 1) |
Start Date / End Date | Controls when the quiz is available |
Duration | Time limit for each attempt (e.g. 01:00) |
Visible | Toggle to make the quiz visible to submitters |
Show Result | Allow users to see their submission result |
Show Correct Answer | Enable visibility of correct answers post-submission |
Dynamic Assignment | Automatically assign users to the quiz via store/entity mapping |
Generate Certificate | Auto-generate a certificate for users who pass ✅
|
Set Up Your New Course in Taqtics
Taqtics allows Admins and Creators to design structured training modules for store teams. You can build courses by uploading files or SCORM content, link them with quizzes, and assign dynamically to users based on their designation. Here's how to configure it end-to-end.
Quick Steps to Set Up a Course
Step 1: Login & Navigate to Creator Mode
- On the landing page, click the Creator Mode button (top-right).
- Click Content & eLearning.
- You’ll land on the Categories & Courses page.
Step 2: Click "Create Course"
- On the top-right, tap Create Course.
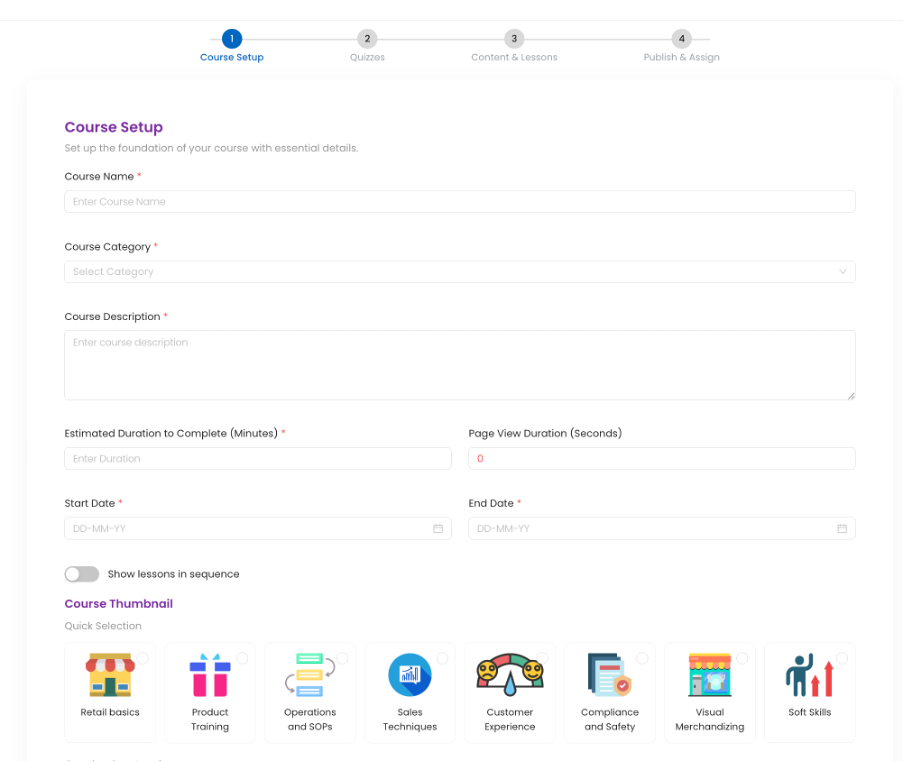
- A course creation flow opens with four stages:
- Course
- Quiz
- Organize
- Publish
Fill Course Details:
- Course Name
- Category – Select from dropdown or click New Category to create one
- Default Course (Optional Toggle) –When enabled, a designation selector appears. If selected (e.g., Store Manager), this course will auto-assign to all future users with that designation. (Dynamic assignment)
- Description
- Estimated Read Time (in seconds)
- Page View Duration (in seconds)
- Show in Sequence (Optional Toggle) : When enabled, users must complete one content + quiz before seeing the next.
- Start & End Date – Configure exact time window for course availability.
- Upload Thumbnail (Optional)
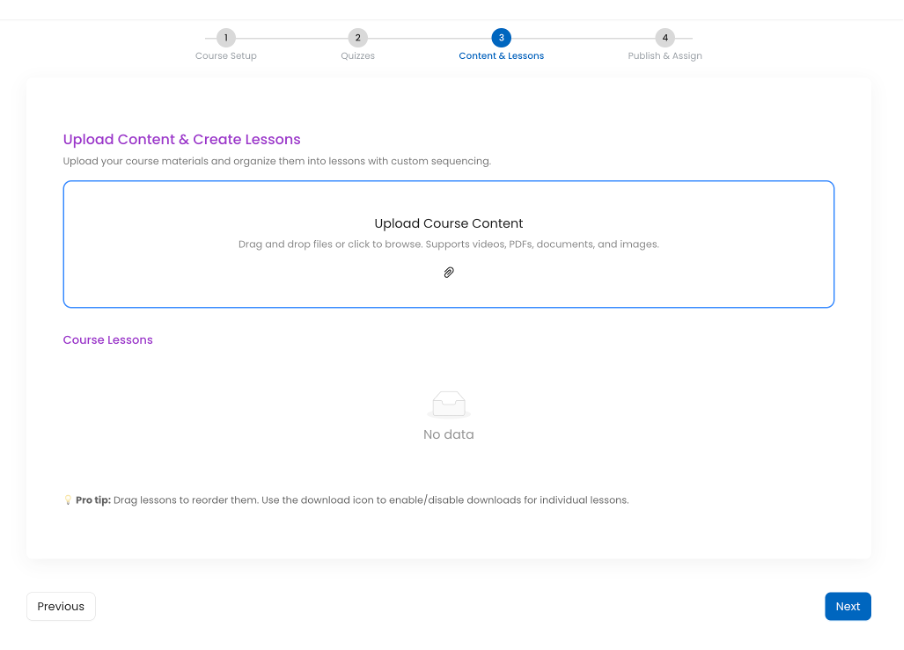
Upload Course Content:
- Accepted file formats:
.jpg,.pdf,.ppt,.xlsx,.mp4
- You can also upload SCORM content.
- All content appears on the right panel in draggable blocks for reordering.
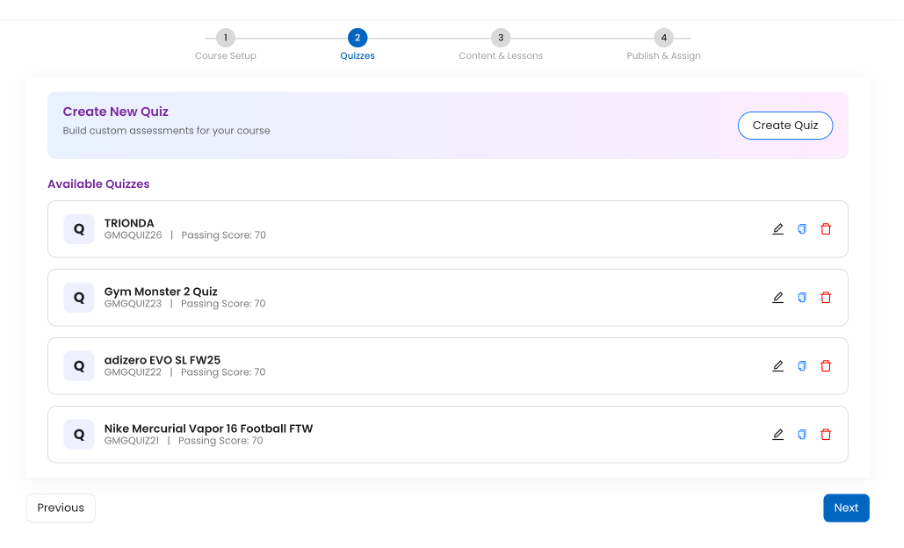
- You can build quizzes ahead using the Create Course Quiz button (see Quiz Setup Guide).
- In this stage, you can add new quizzes to the quiz bank if not already created. Linking quizzes to specific course content happens in the next stage.
- Reorder content blocks by dragging them.
- Rename uploaded files if needed.
- For each content block:
- Enable Quiz → Select from the dropdown of available quizzes not already assigned to other content blocks.
- Enable Download → Lets users download the material.
(Each quiz can only be linked to one content block. To reuse logic/questions, create a new quiz.)
You can assign this course in two ways:
Assign by Store:
- Select stores/entities → Map with designation → Assign course.
Assignee Profiles
- Use assignee profiles if already configured. (Learn about Assignee Profiles)
✨ Learning Management Creator Flow Refresh
The course creation and management flow now features a modern, contemporary design.
This completes the course configuration journey. Once published, users can start learning, complete quizzes, and track their certification status.