
Fill & Update your Asset items by Process Auto Fill
Some processes in Taqtics are linked to asset tables — allowing users to directly view or update asset details while filling a checklist. This is especially useful for recurring updates like license renewals, inventory counts, or document changes.
If the process or audit is configured with only Asset Table Integration, you'll see an Auto-Fill button at the top when filling the form. This enables you to fetch an existing asset item and update selected fields in real time — without jumping between modules.
Step-by-step: Fill an Asset-Linked Process
- From the left-hand menu, click on
Tasks.
- Use the search bar to find the process assigned to you.
- Click on the correct process from the list to open its details.
- Hit the
Startbutton to begin filling the form.
- At the top-right corner, click the
Auto-Fillbutton.
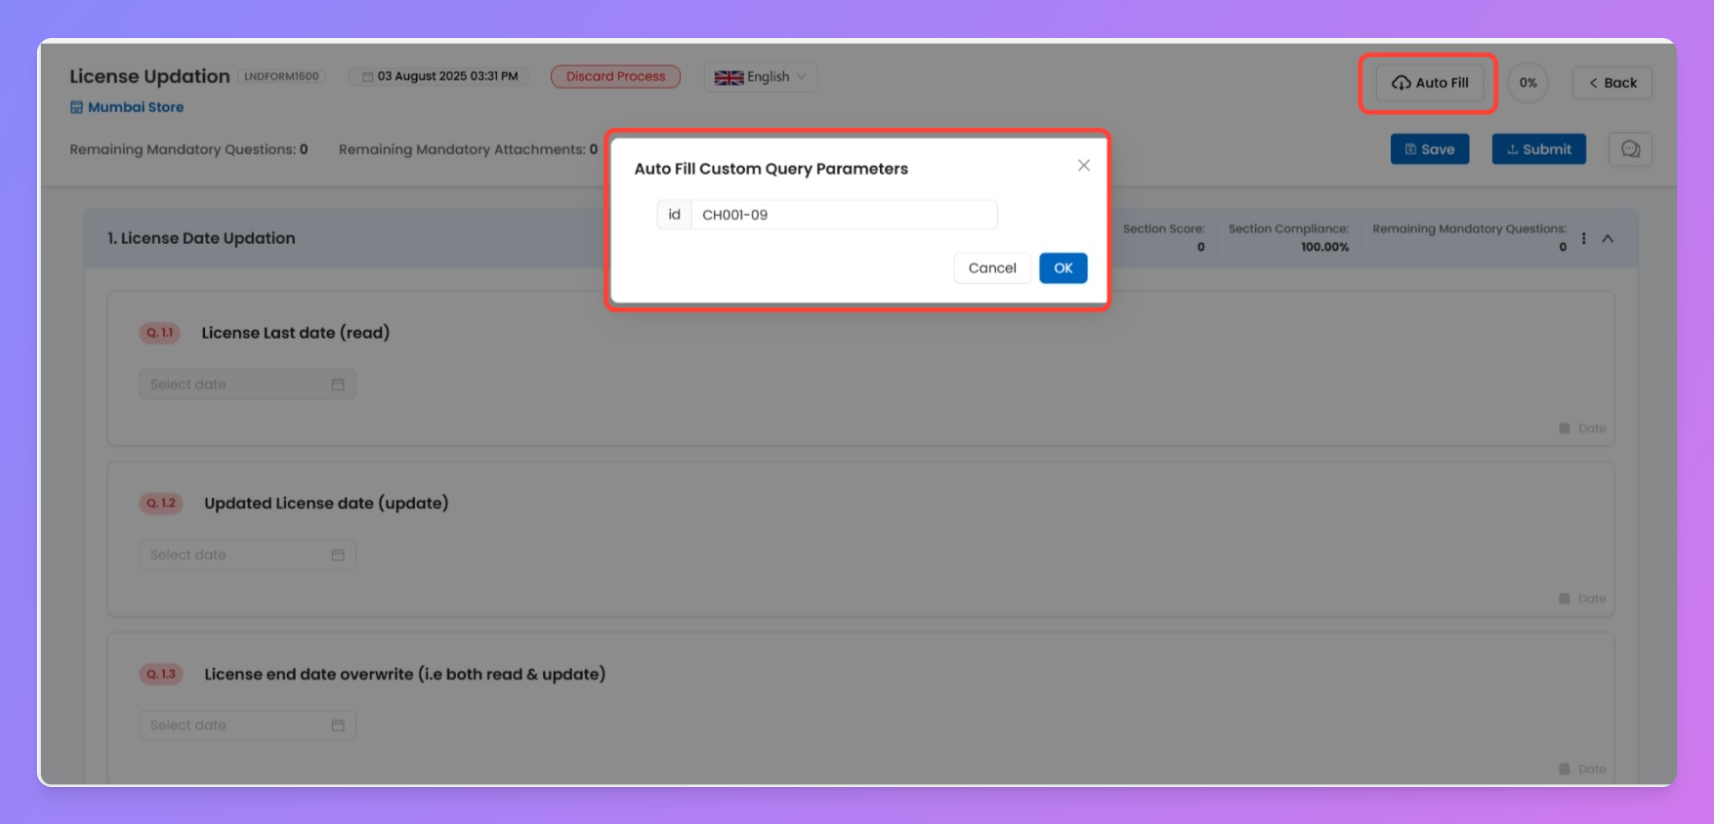
- Enter a valid Asset item ID (not the table ID) in the field shown.
- Once you hit enter, the form will auto-fill:
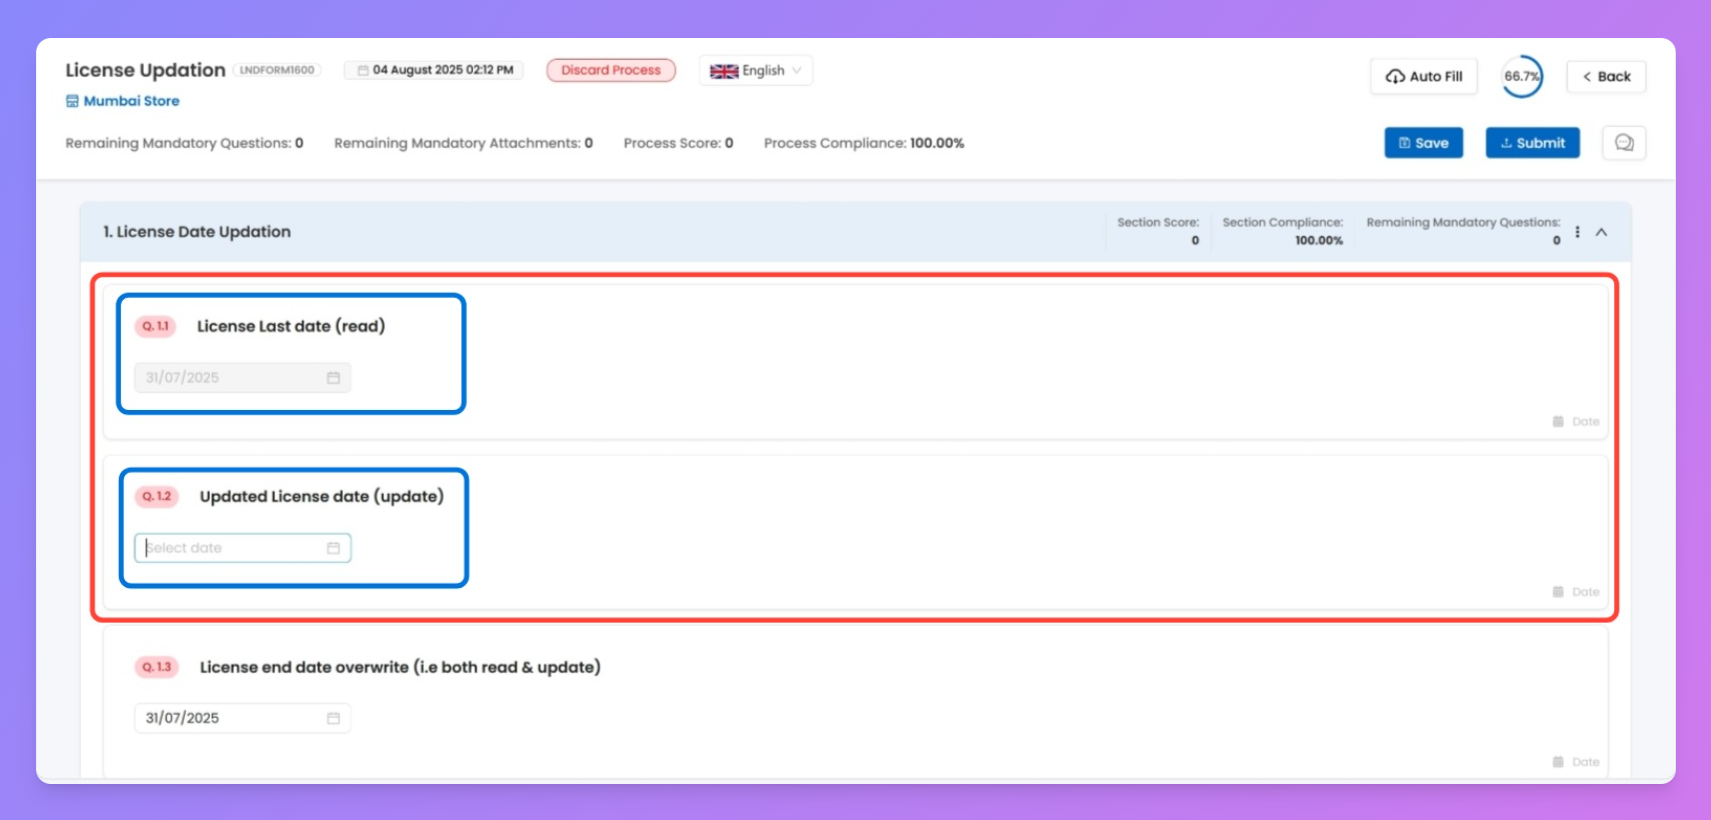
- Questions with Read Only asset enhancements will pull the current asset values.
- Questions with Enable Asset Item Updation enhancement will allow you update those asset fields.
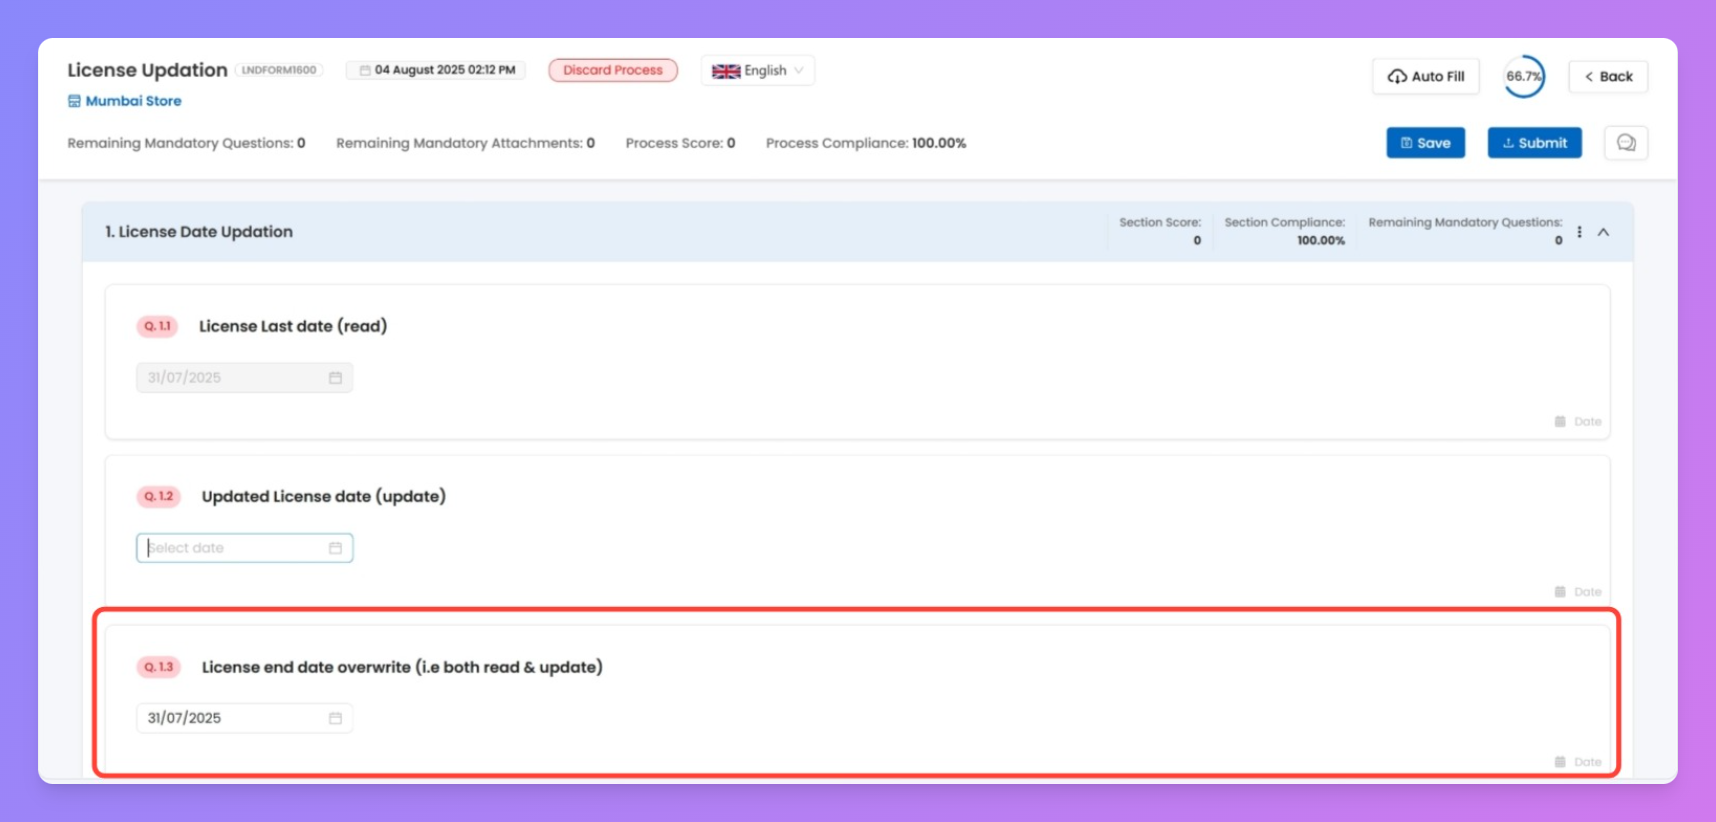
- Questions with Read + Enable Asset Item Updation enhancement will allow you view and overwrite those asset fields.
- Continue answering any other required questions.
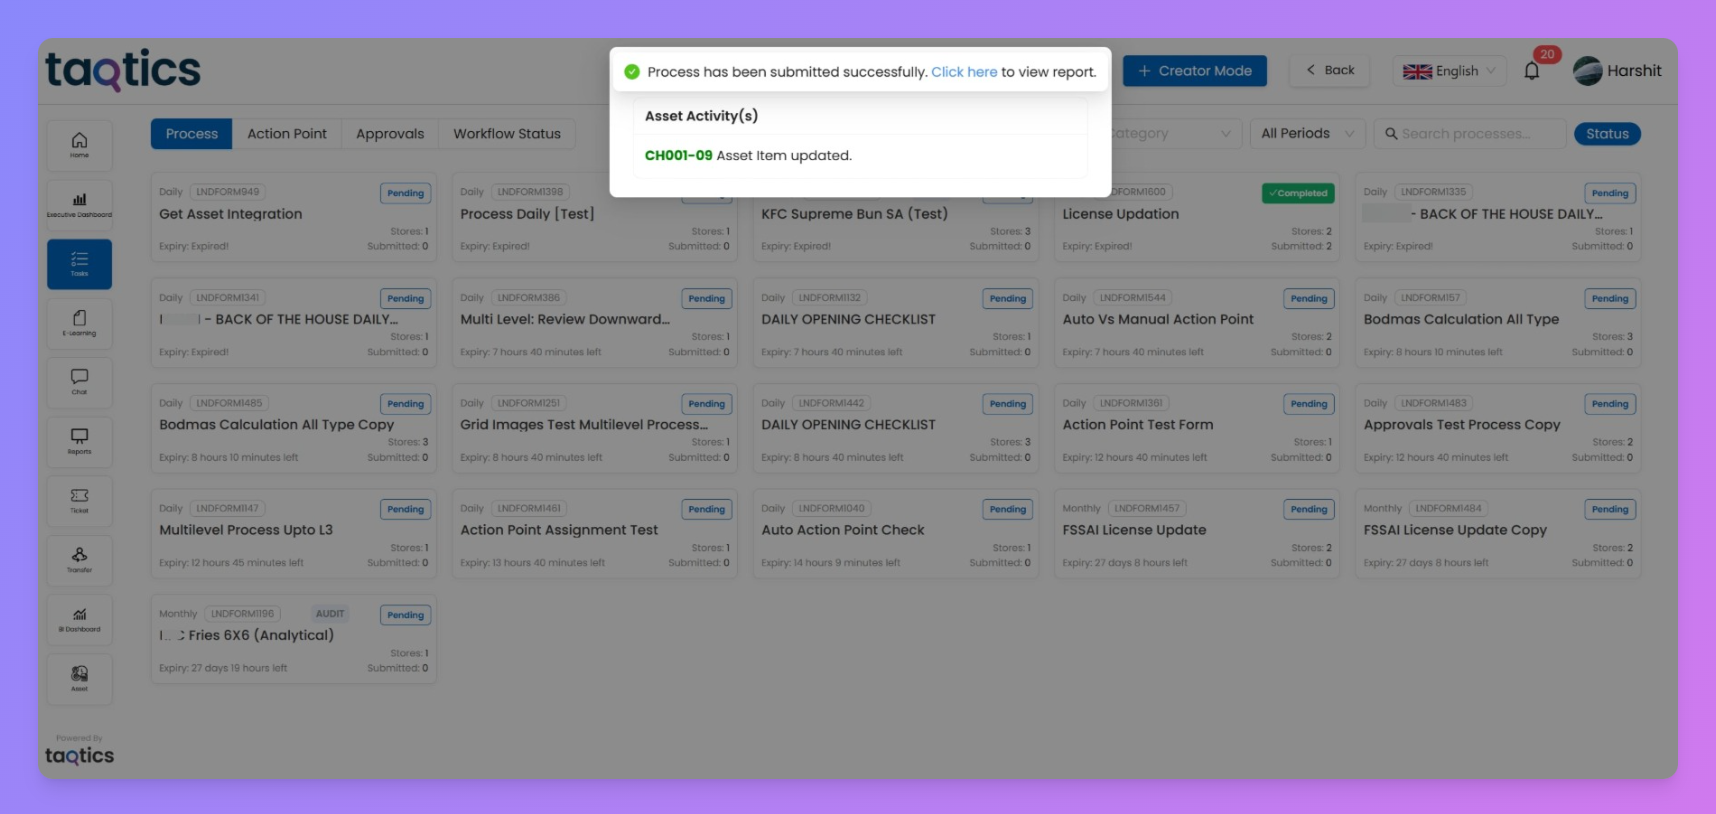
- Once done, click Submit to complete the process.
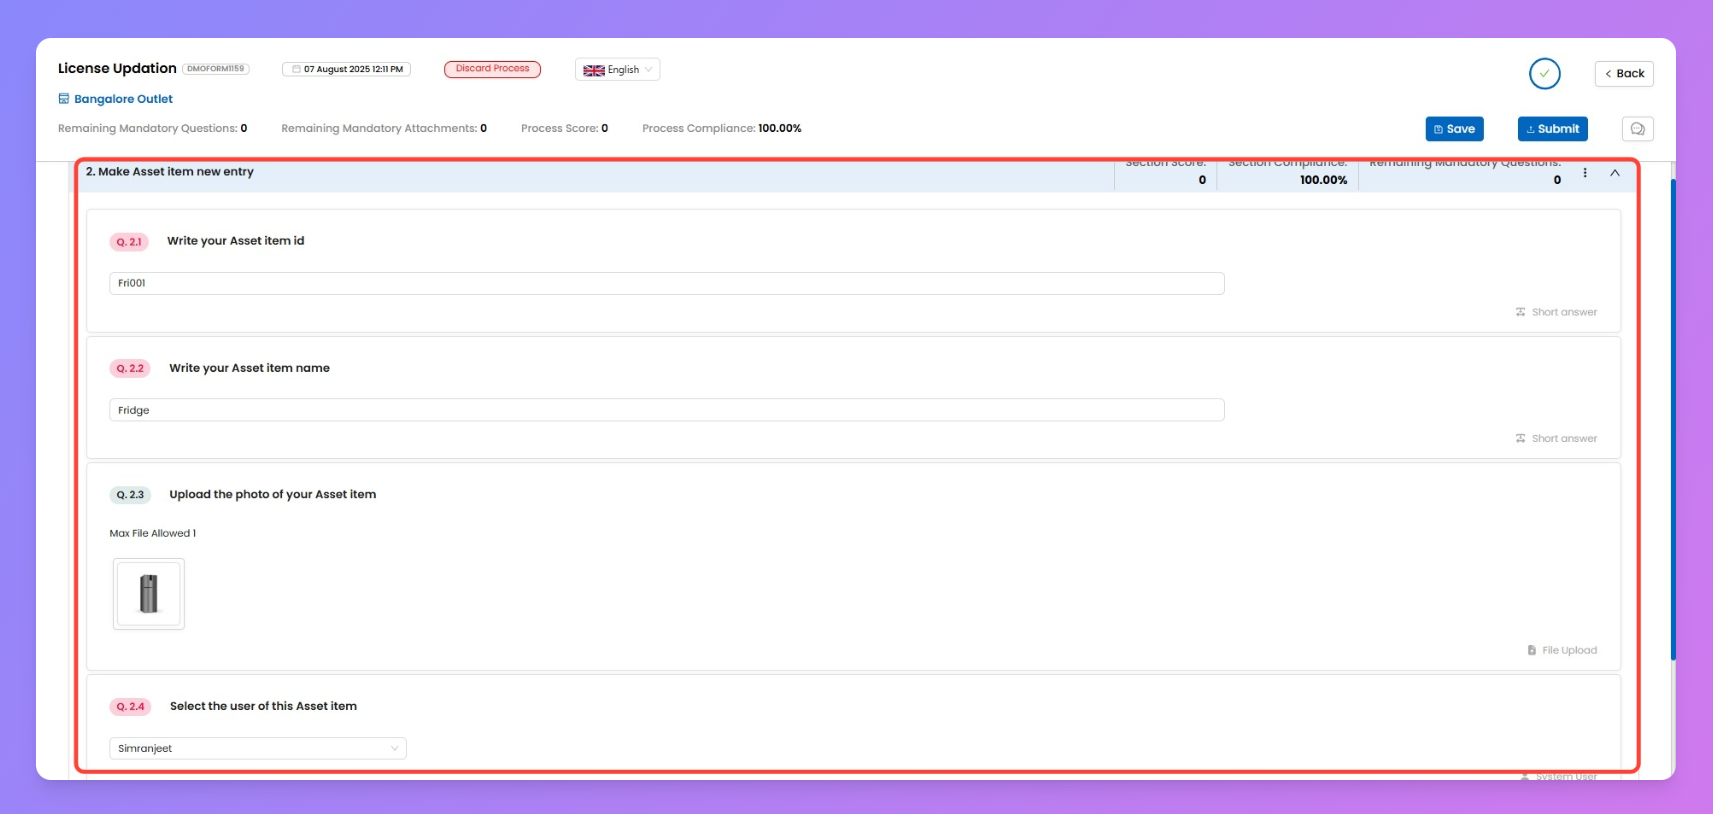
Create New Asset Items via Checklist
If your process has been configured with Asset Table Integration + Asset Item Creation, it enables users to create brand new asset entries directly from the checklist — perfect for registering new equipment, uploading newly acquired licenses, etc.
There’s no Auto-Fill option in this case, since there’s no pre-existing asset to fetch from. Instead, you'll fill all relevant fields and on submission, a new asset item will be added to your configured asset table.
Step-by-step: Fill a Process to Create a New Asset
- Open your assigned process from the Tasks section.
- You will see input fields for each mapped asset column (like Asset ID, Name, Store, etc.).
- Fill in all the mandatory fields (they’ll be marked in red).
- Optional fields (like file upload or image fields) can be filled based on need.
- Once complete, hit Submit — the system will automatically create a new asset item inside your asset table using the values you’ve filled in.

⚠️ Note: Make sure all required fields (configured in the asset table) are present and filled in the checklist. Missing mandatory inputs will block submission.